How to Perform an Upload Send in CXT
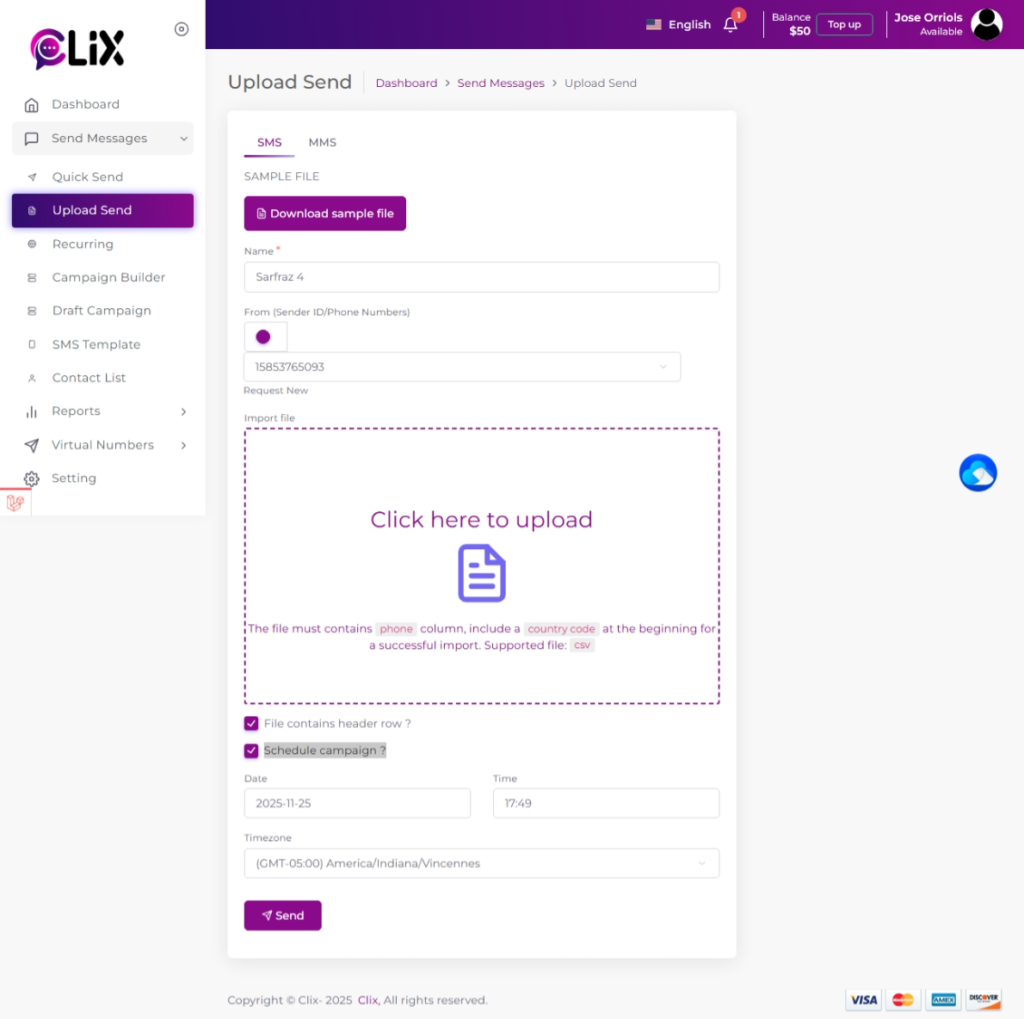
- Select “Send Messages” in the left-hand side of the CXT panel, then click on “ Upload Send”
- At the top, select whether you want to send as and SMS or an MMS. The default option will always be set as SMS.
- Select the number you wish to your message to originate from.
- Select the ‘From’ dropdown to view available Sender ID options, including shared numbers, custom words, virtual numbers, or your registered account number.
- Under ‘Import File’, click on ‘Click here to Upload ‘ and browse to attach the relevant file of contacts.
- Make sure your contact file follows the correct format. Refer to ‘How to format an Excel spreadsheet’ for guidance.
Note: If your Excel file’s first row includes headers like ‘Name’ and ‘Mobile Number’, be sure to select the ‘First row has headers’ checkbox.”
- Enter the message content in the “Message’ box.
Note: SMS messages are limited to 160 characters (70 for Unicode). Exceeding this will result in being split into a multi-part message.
Note : If you’d like to reuse a message you’ve already created, select the ‘Templates‘ box to view them.
- On the right hand side of the page, you will see “ Preview Message’. This shows how the message will appear when sent, double-check that the information is correct.
- The send you message.
- To have your message sent instantly click the “ Send” button.
- To send your message at a later time, select ‘Schedule campaign’, then enter your desired date and time. Click ‘Schedule Campaign’ to confirm.”